STEP 1 PREPARE THE WORKPLACE & THE BASE OF THE
SCULPTURE
First students need to prepare their workplace – place all the necessary materials on
their desks. Then they choose a bottle to be the base of their sculpture. They
need to fill half of their bottle with sand. Finally, they put a piece
of wood, a stick in the mouth of the bottle.
STEP 2 MAKE THE FINAL SHAPE OF THE MODEL
Students
can use plasticine (use it to fill the space between the bottleneck and the wooden
stick), aluminum foil, newspapers and tapes to form their model. They can add
some elements (e.g. wings, feet, ears etc.) to get the final shape of it.
STEP 3 PREPARE YOUR SUPPLIES: GAUZE BANDAGES &
PLASTER
Students cut
down bandages into strips (10-15 cm long). They need enough strips to cover the
whole model. Next they dip a piece of gauze bandage in plaster (1 cup of water
mixed with gypsum – it should have the consistency of thick cream) and place it
on the model. They should put the pieces of bandages in different directions (vertically,
horizontally and diagonally) on the model, ensure that they adhere directly to
the surface of it, and avoid leaving gaps between strips. They need to work fast
because the water-gypsum mixture dries up very quickly and soon it becomes hard
and impossible to shape. Finally they check if the pieces are overlapping
properly and ensure that there are as few bumps as possible. In the end, they
allow the models to begin drying.
STEP 4 COVER THE MODEL WITH WHITE EMULSION PAINT
Students
coat the finished model with white emulsion paint. The paint must be applied
properly on the surface of the model to avoid having cracks and give a stunning
finish to the sculptures. Each coat/layer of paint should be applied with a brush
to give proper coverage. In the end, they allow their sculpture to become dry.
STEP 5 PUTTING FINISHING TOUCHES
Students
design the final look of their sculpture. They choose colors, decorative
elements to attach to it. They use paints ( if necessary: beads, buttons,
feathers etc.).
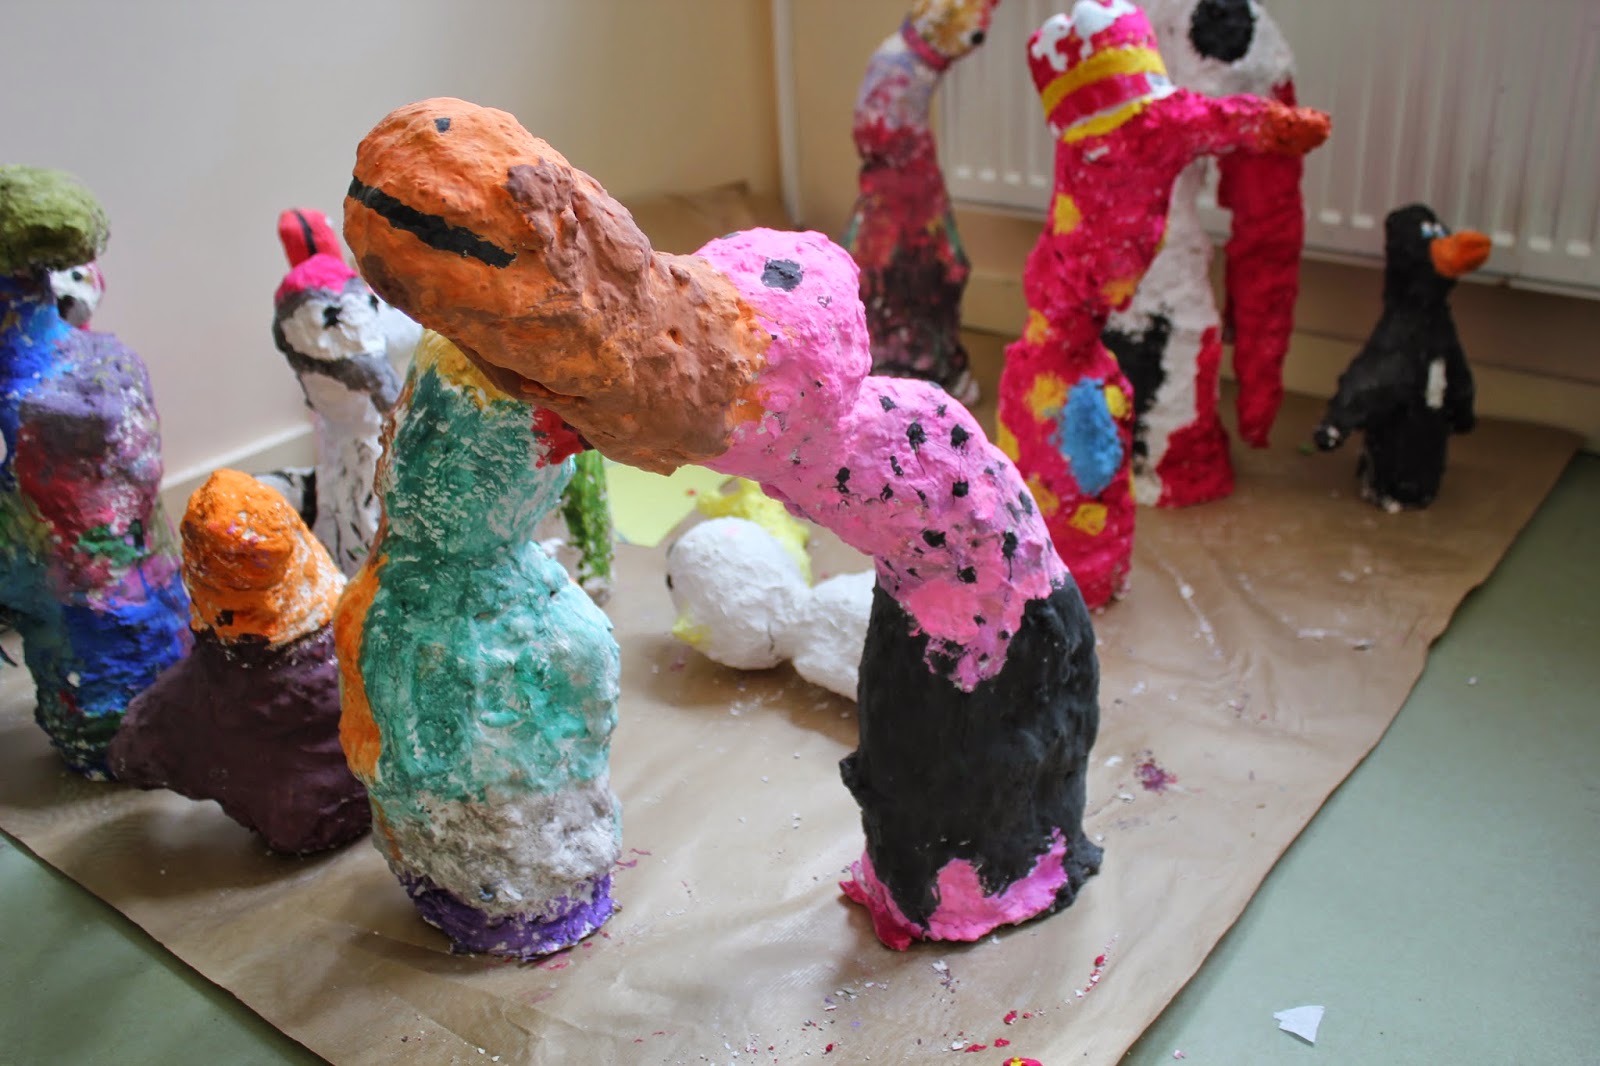
The students' works of art are fantastic! Many great thanks to Tosia's Mom, and Kay's Mom. They have done an amazing job! Thanks to them we may admire the following sculptures:


The students' works of art are fantastic! Many great thanks to Tosia's Mom, and Kay's Mom. They have done an amazing job! Thanks to them we may admire the following sculptures: